A seat post never creaks for no reason, not even on your bike. Super annoying, right?! I’d be happy to help you quickly fix that because, in many cases, the solution is actually quite simple.
I’ve dealt with this issue so often that it’s become a piece of cake for me to solve. So, I’ll explain the steps you can take to fix that creaky seat post.
Be sure to read my article to the end so you’ll know exactly which parts to check and how to eliminate those annoying creaks.
Table of Contents
Seat post creaking? Are you sure about that?
Before proceeding with the next steps, you naturally need to be sure that the creaking is coming from the seat post. An easy way to check this is by going for a bike ride.
Do you hear the creaking only when you’re sitting on the saddle? Then, you can almost certainly assume that the creaking is coming from your seat post. If the creaking is also audible when you’re standing on the pedals, then the chances are high that you need to look at other components. Consider checking the bottom bracket, wheel bearings, headset bearings, loose or overly tightened bolts, etc.
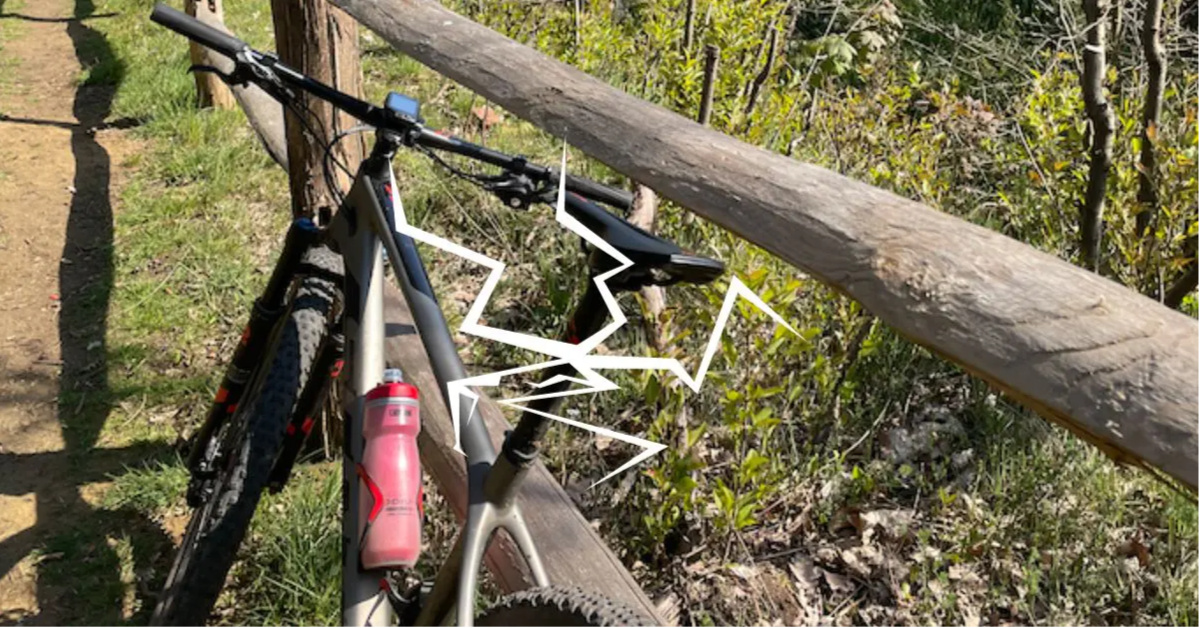
A creaking seat post; here’s how to fix it.
A seat post doesn’t creak without reason; that’s something I’ve learned from experience. So, there’s always a cause or reason behind it. But to make it a little more complicated, there are still two things you’ll need to check.
On the one hand, the creaking may originate from the connection between the seat post and the saddle. On the other hand, it could also be the connection between your seat post and the frame causing the annoying creaking.
If both problems only occur when you’re sitting on the saddle, then it’s usually indeed the seat post. As I mentioned earlier, you should look elsewhere for the problem if you also hear the creaking while standing on the pedals…
While you’re at it, I advise you to check both connections and apply both solutions (see further). It’s quite difficult to pinpoint exactly which of the two causes is truly the source of the creaking.
The connection between the seat post and the saddle
If the creaking is coming from your saddle, then it’s important to check the bolts, rails, and connections. By checking, I mean loosening everything, cleaning it, and inspecting for any damage, such as cracks or fractures.
In most cases, mud, dirt, and/or dust cause the creaking. Loose or overly tight saddle bolts can also cause creaking. However, it’s wise to give the whole setup a good cleaning occasionally. You’ll be surprised at how much dirt and grime you’ll remove from it.

Here’s how you proceed
The bolts to mount the saddle are usually hex bolts, which can be easily loosened using an Allen key.
You’ll notice quite a bit of dirt on these parts. Clean the components thoroughly and remove any grease and/or assembly paste remnants.
Extra tips
Pro Tip #1: For stubborn dirt, I sometimes use brake cleaner to get parts clean. I actually use brake cleaner quite often to clean parts other than the brake discs. I use Brake Booster from Dynamic, but any brand will do the trick.
Once everything is clean, be sure also to clean the top of the seat post thoroughly.
Before reassembling everything, applying a thin layer of assembly paste to the parts is important. If you have a saddle with carbon components, use carbon assembly paste or one suitable for all materials.
Apply a thin layer of assembly paste to the saddle rails (where the connections will be) and to the threads of the bolts.
Then, tighten the bolts using a torque wrench. This way, you can tighten the bolts with the correct force, and they won’t be too tight or loose. In most cases, the maximum force in Newton meters (Nm) will be indicated on or near the bolts.
Pro Tip #2: The problem may be resolved by cleaning everything thoroughly. However, there’s still something else you can check: the connections of the saddle rails with the saddle itself. For this, I always use a multi-spray (Mechanics Magic). You can eliminate any creaking by applying a bit of multi-spray to the connections.
You can now check if the creaking is gone by taking a test ride while sitting on the saddle. If it’s not gone, then be sure to follow the next step. If the creaking is gone, the cause was likely somewhere between the saddle and seat post. However, it’s still not wise to take the next step.
Seat post creaks in frame
The creaking may also originate from the connection between the seat post and the frame. This is also relatively easy to fix. As you might guess, in this case, it’s also important to give things a thorough cleaning.
Here’s how you proceed
More tips
Pro Tip #3: Before loosening the seat post, it’s wise to mark your saddle height with a piece of tape. Stick the tape on the edge of the seat post where it enters the frame. By marking the saddle height, you won’t need to measure afterward, saving you a lot of time.
The bolt of the seat post clamp can be either an Allen key or a Torx bolt. Make sure to use the correct tool to prevent damaging the bolt head.
Next, remove the seat post from the frame.
Pro Tip #4: If you have a mechanical dropper seat post with a cable, it becomes more interesting. You may not be able to fully remove the seat post from your frame due to the cable running to your handlebars. You may need to detach the dropper mechanism to remove the seat post from the frame. This will give you more cable length, allowing you to remove the seat post entirely from the frame. Alternatively, you can detach the cable, but ensure you can reinstall it properly.
Then, thoroughly clean the seat post, clamp, and bolt. Don’t forget to clean the opening in the frame where the seat post goes back in. Once again, you can use brake cleaner for this, for example.
Before reassembly, take out your jar or tube of assembly paste. If you have carbon components, make sure to use carbon-compatible assembly paste. Apply a thin layer of assembly paste on the seat post (on the part that goes into the frame). Also, apply some assembly paste to the inside of the frame.
Then, reinsert the seat post into the frame. Hopefully, you’ve marked your saddle height and know how far the seat post needs to go into the frame.
Next, adjust your saddle direction and tighten the clamp ring bolt. The clamp bolt shouldn’t be overly tight, and the correct torque is usually indicated on it, typically around 4 Nm. Therefore, be sure to use a torque wrench to tighten this bolt.

Summary
Below is a brief summary of the causes and solutions if you’re experiencing a creaky seat post. I’ve listed the causes in the order in which they most commonly occur. Finally, I’ll show you all the tools and products I use to get rid of a creaky seat post.
Seat post creaking: causes
A creaky seat post can have various causes, including:
- Dirt, mud, and dust between seat post-saddle connections and/or seat post-frame connections
- Loose bolts
- Over-tightened bolts
- Damaged components
Solutions:
- Cleaning and inspecting components for damage
- Applying assembly paste + reassembling everything
- Tightening bolts to the correct torque
- If parts are damaged; replace them.
My seat post rescue kit
Below are the tools and aids I use to remedy a creaky seat post:
- 6mm Allen key
- T 25 Torx wrench
- Torq wrench
- Dynamic Galactic Grease (carbon safe)
- Dynamic Brake Booster
- Dynamic Mechanics Magic (multispray)
- Dynamic Microfibre cloth
- Repair tape (to mark saddle height)

Does your seat post still creak?
If you’ve performed the above steps and still experience those annoying creaks, the creaking may originate from one of the other components on your mountain bike or bicycle. While frustrating, it’s also an opportunity to rule out the seat post as the cause of the creaking.
As I mentioned at the beginning of this article, in this case, it’s essential to check other parts. In most cases, dirt, dust, or mud may be the culprit. However, it’s also possible that components such as bearings may need replacement if they are worn out or damaged, as poorly maintained or broken parts can also cause irritating squeaks and creaks.
If you own a dropper seat post, periodic maintenance of this component is also advisable. Being a moving part, it may begin to function less effectively over time, potentially causing annoying noises.
Final thoughts
A creaky seat post can be incredibly annoying, but as I’ve outlined in this article, the solution (in most cases) is quite simple. A seat post doesn’t creak for no reason, and the solution lies in checking the connections between the seat post and the saddle, as well as the seat post and the frame.
In most cases, dirt, dust, and mud are the culprits, and the issue can be resolved by thoroughly cleaning everything, applying fresh assembly paste, and correctly tightening all bolts to the specified torque.
Of course, a seat post, saddle, or connection can also become damaged and cause creaks. However, in practice, I’ve never experienced this myself, and the cause has always been attributed to dirt, dust, and/or mud.
If you hear creaks while riding, particularly when sitting on the saddle, it may be time to clean everything thoroughly. There’s nothing wrong with performing an interim check and cleaning your seat post. This way, you might even prevent those annoying creaks from occurring in the first place…
I hope this article has helped you fix your creaky seat post. I’m curious to know if that’s the case. Be sure to let me know in a comment below.
Geert, you have saved me from a lot of brain damage. Thank you!. Taking your advice I 1) re-cleaned the dropper and seat mount 2) completely slimed the dropper post, seat post mount, and seat rails with carbon paste 3) reassembled and torqued with the approved Yeti settings. The bike is so quiet that I now am hearing the chain ring and chain clicking slightly as I peddle. Nothing to fix there, I clean and re-lub the chain every other ride.
My Yeti Arc has had issues with periodic clicking tapping noise since I bought the bike. I switched out the seat post, seat, peddles to localize the problem. It wasn’t until I read your post that I came to the conclusion that there wasn’t enough carbon paste on the complete dropper post. Applying a minimum of paste to the area around the seat post clamp simply wasn’t enough. I am sure that someone reading my response would tell me to never do that but I haven’t heard a peep so far.
Thanks for your comment, great to hear my advice helped you solve the noises… Cheers